main bathroom design | Part I
The main floor of the house has one bathroom. It also has 2 bedrooms and our primary entertaining area - the Great Room and Kitchen. With this in mind, I approached the bathroom layout and design knowing I had to functionally solve for 2 scenarios:
(1) I wanted it to feel like a powder room for guests
(2) I wanted it to feel like a luxe spa experience for those using the shower on a regular basis
Initially these sound contradictory but in actuality, these constraints pushed me towards a scheme I would not have originally thought of…
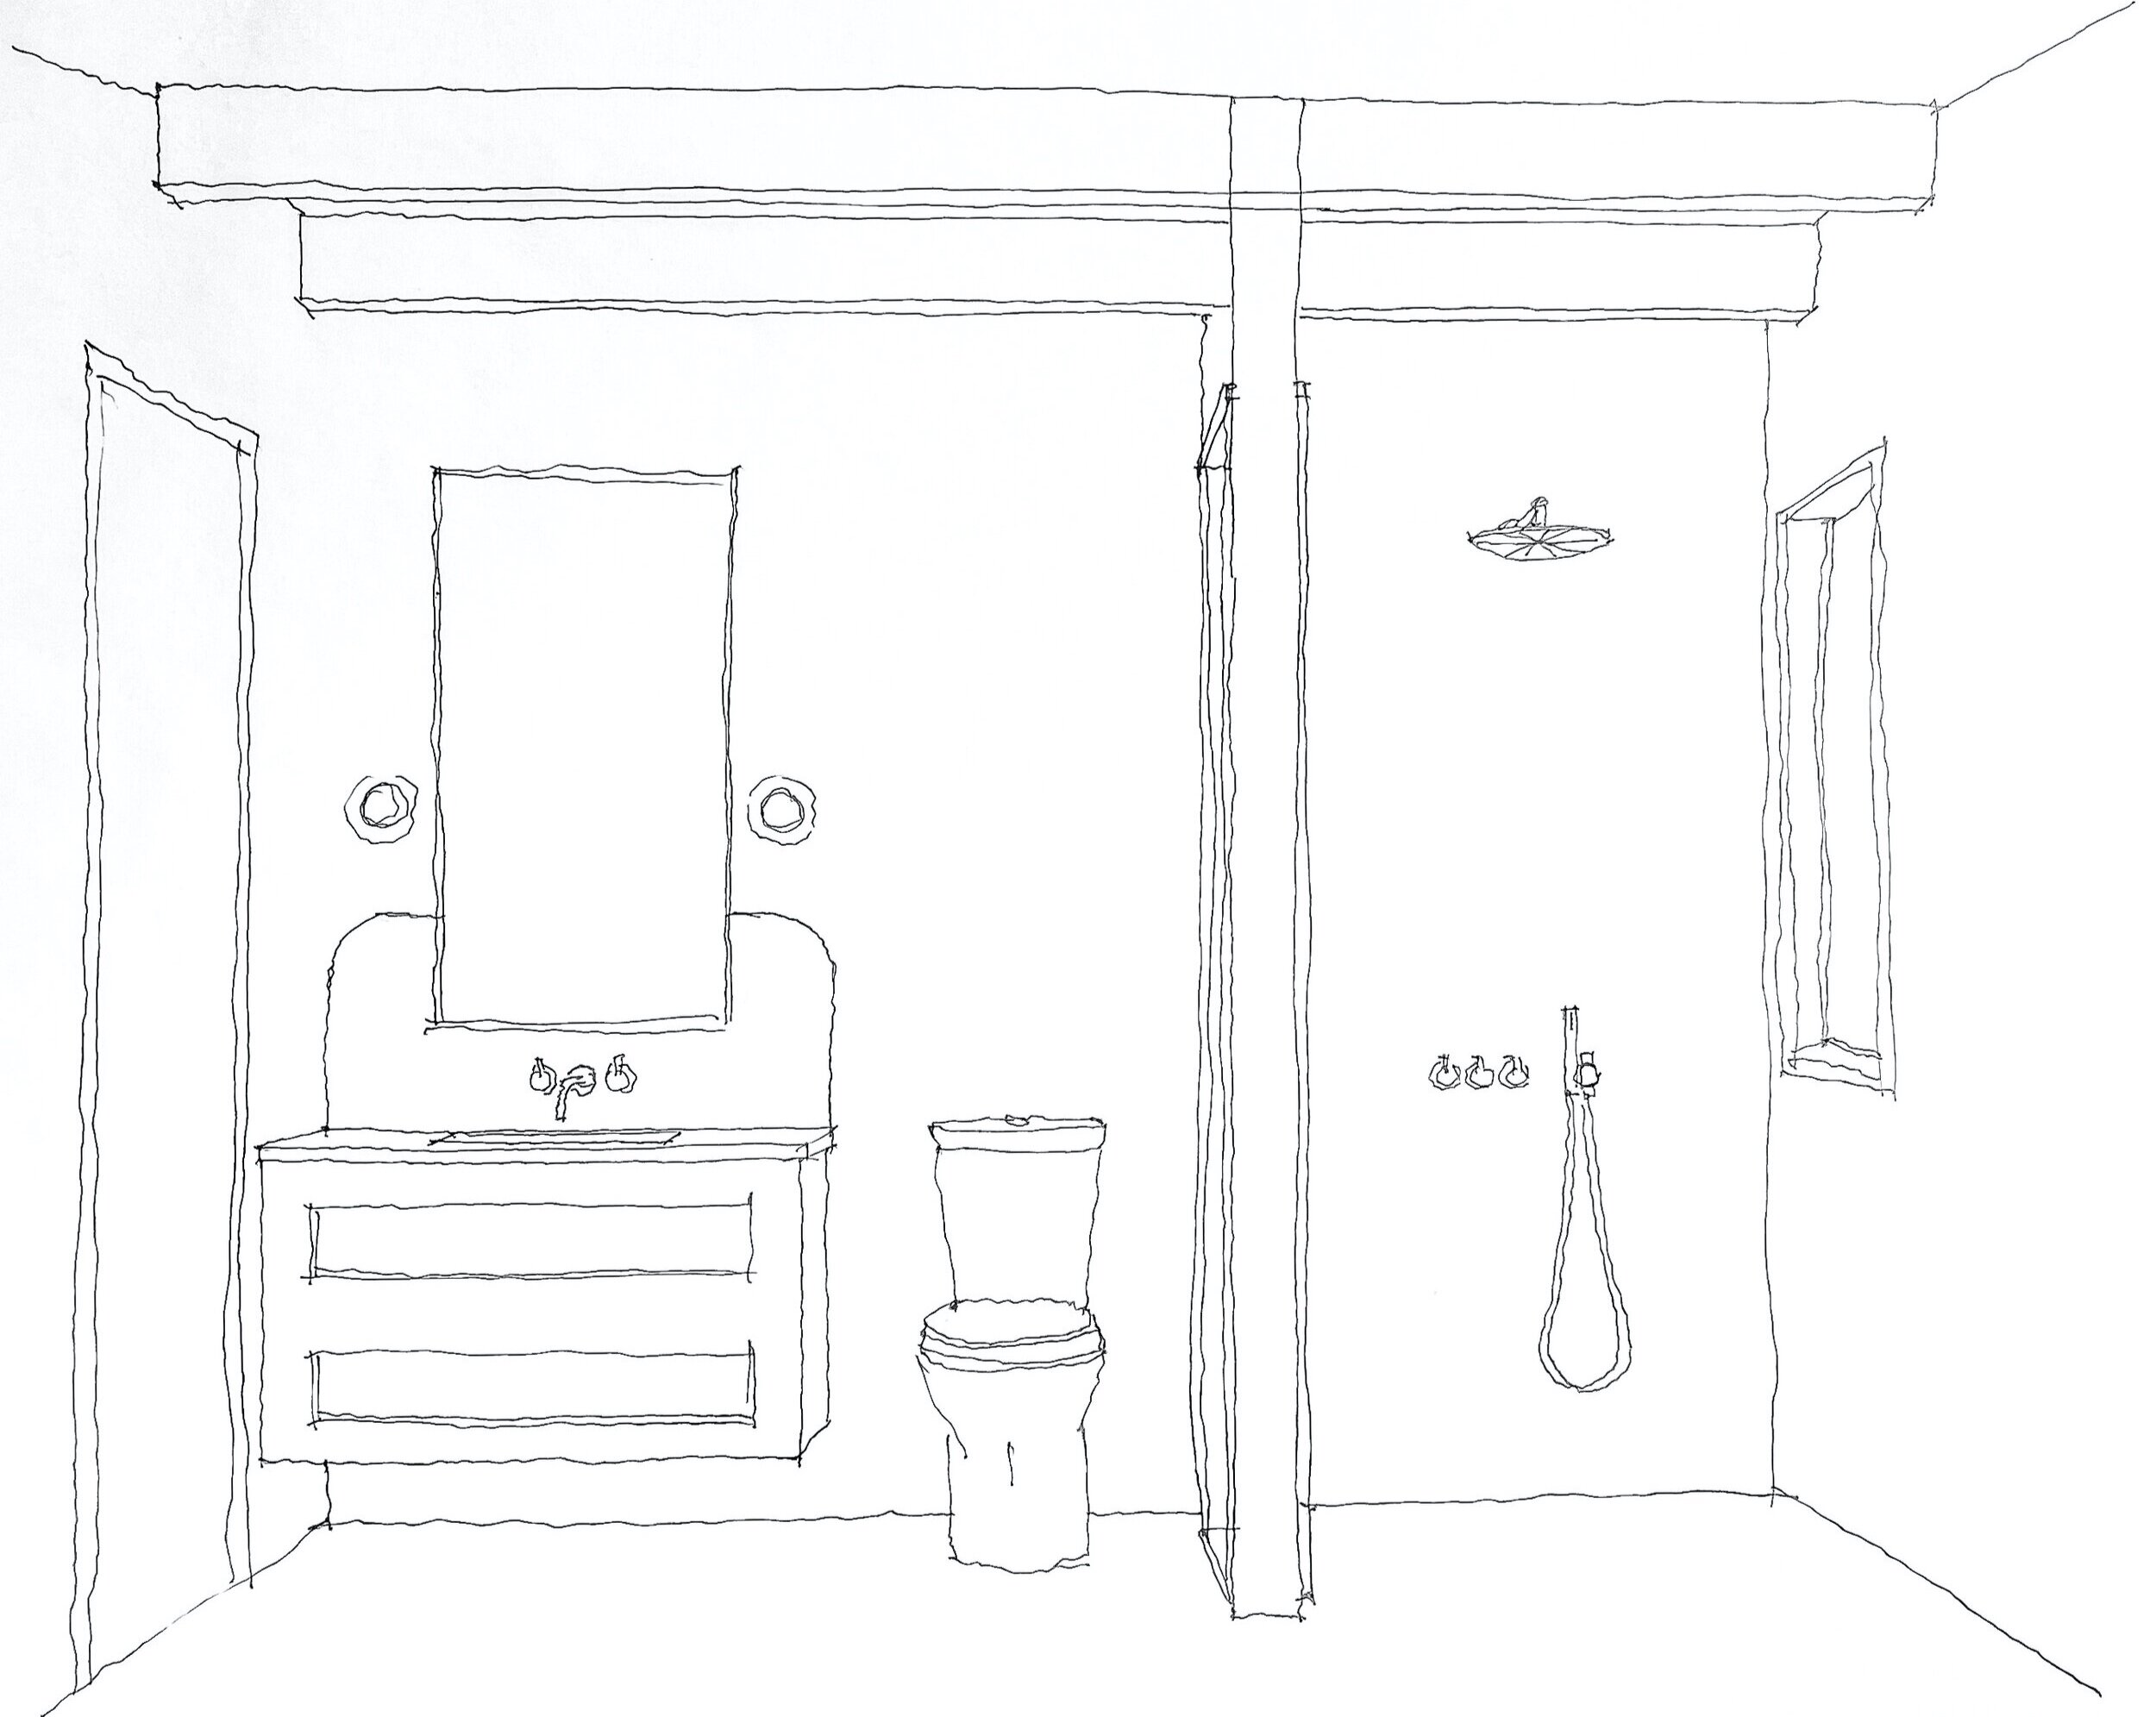
I didn’t want to use a glass divider because the spaces would still feel very connected visually. I didn’t want guests coming over to see everything that was in the shower which sometimes looks messy. I also didn’t want to deal with a shower curtain. After renting apartments in Manhattan for 15 years, I'm ready to move on from the plastic liners. Instead, I opted for a proper wall so each space felt fully enclosed. The shower niche for shower products is not at all visible to guests using the powder room and the closed off nature of the shower allows you to feel all encompassed within that space. The layout was solidified pretty quickly.
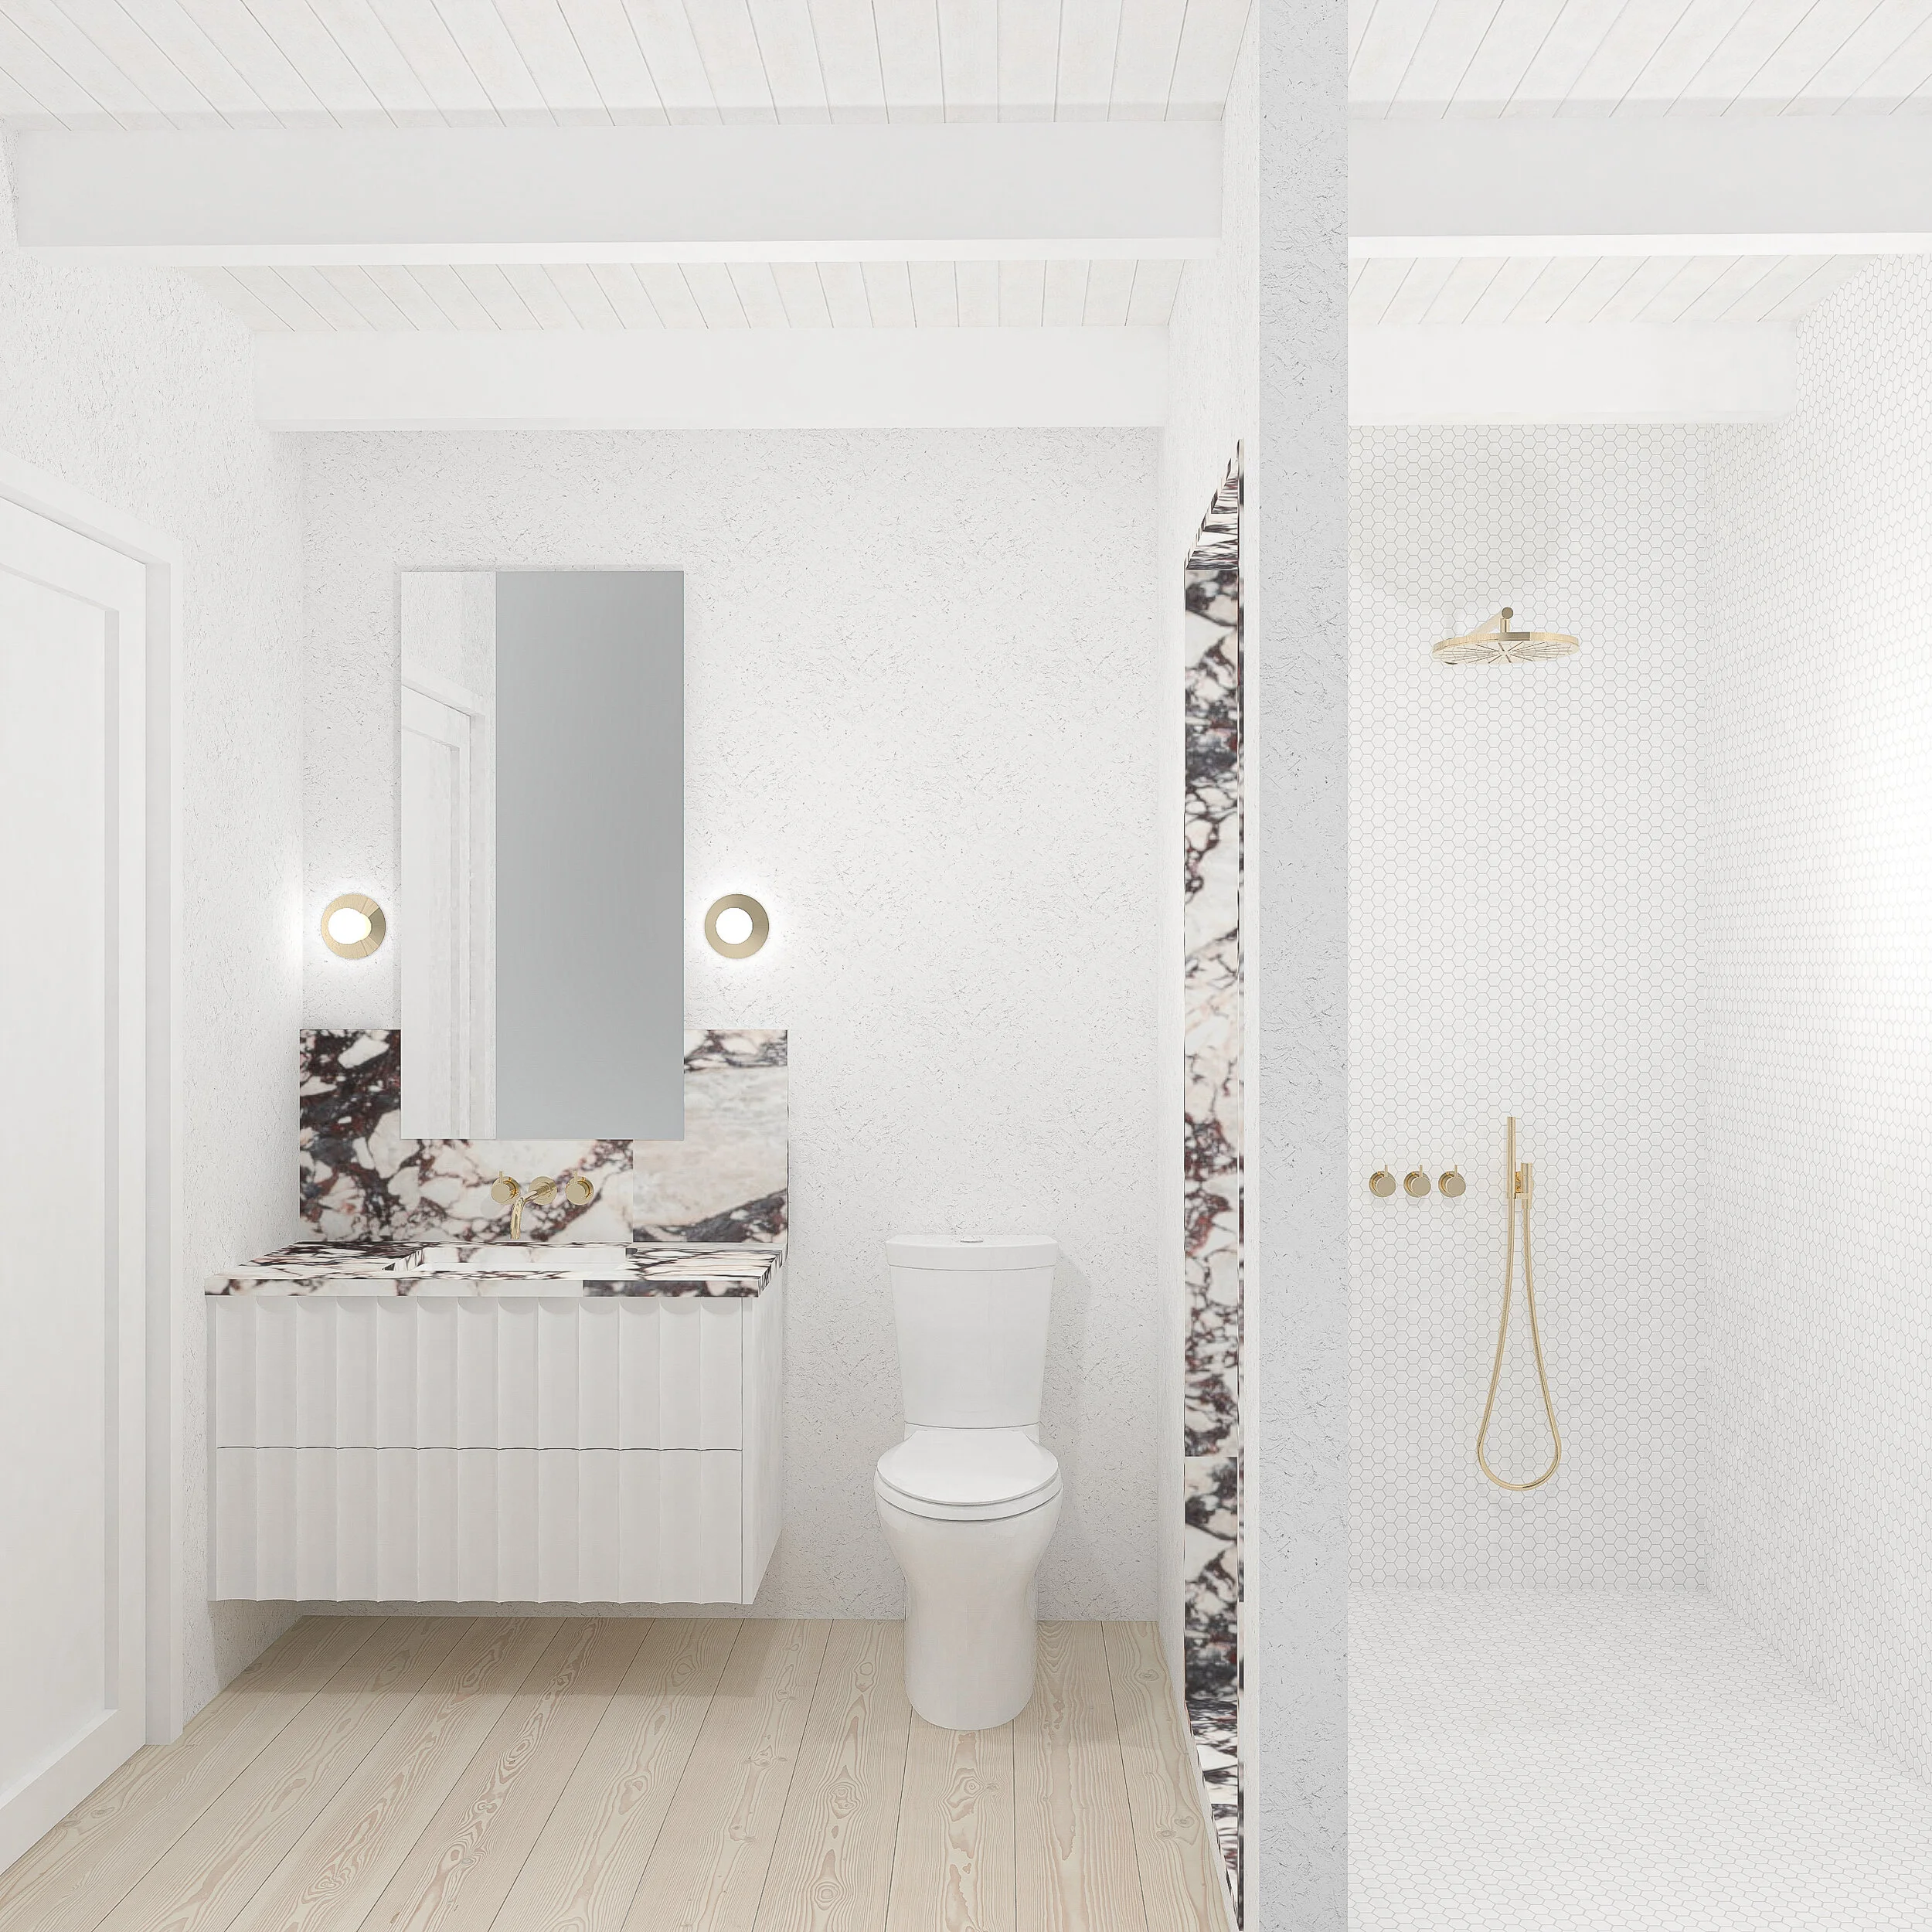
Next up, how do I make both spaces feel special and distinct for their purpose but aesthetically linked? With the material palette. For this bathroom, I want to keep the palette pretty simple and straightforward and make a few design moves. The first design move I focused on was bringing in a statement material. I used this in the exaggerated backsplash and the portal to the spa shower to aesthetically link the two. Initially, I began exploring the backsplash detail - did I prefer the curved edges or the straight? Here were my quick studies:

Vanity with curved marble backsplash
Vanity with straight marble backsplash
Analyzing the wall texture
I like both actually and will hold off on making my mind up there. What I did notice in these renderings was that the wall surface fell flat a bit with all of the white in the space. To address this, I did a quick study with vertical wall paneling - still painted white - but adds a bit of texture:

Vanity with scalloped drawers in white
Ahhh much better, now we’re getting somewhere! I’m loving the floors, walls and backsplash accent so now let’s dig into the bathroom vanity drawers. My plan here is to use ikea and make custom panels. I’ll talk a bit more on the give-and-take when it comes to budget and share my thoughts on where to splurge vs save in another post but important to note there are a lot of cost effective materials going into this design (the marble, unfortunately, is not one of them!).
Testing the Vanity options
In the above renderings I used a scalloped-edge detail on the front. I really do like this drawer front, however, with it being white and almost the same scale of the wood paneling it felt a bit redundant. I wanted to try out a few more vanity options. Here we go! I started by simply switching the materiality to a light wood:

Vanity with scalloped drawers in light bleached oak
Compelling, lets continue on with a few more options…

Vanity with ribbed drawers in white

Vanity with ribbed drawers in bleached oak

Vanity with white drawers and caning detail

Vanity with bleached oak drawers and caning detail
My Picks
I also tested some standard shaker and flat panel drawers but they both fell a bit flat in the space. Here are my favorites:


If you’ve made it through this extremely detailed study - thank you! Let me know what you think in the comments below! Now that I have tested a wide array of options within this one aesthetic concept, i’ll apply what I learned from this and prepare a few cohesive distinctly different options to evaluate - stay tuned for Part II later this week!